# Edit your site
Once you are all set and ready to start using the DG1 platform, you must first manage your site and set it up.
You can find your default site in the header of your DG1 admin section.
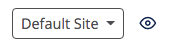
Navigate to the dropdown and click Edit. This will open your Site settings.
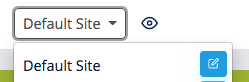
Site settings are all the crucial operational settings for your site. Anytime you wish to change the configuration of your site, this is where you should go.
The five tabs (General settings, Language settings, Style, Logos and Store settings) kindly guide you through the process. And whenever you need to return to the Site settings page to adjust any part of the information, just use the Quick access links, available on the right hand side, to quickly navigate to the settings you are looking for.

Once you are done with Site settings, click Submit and the website will truly be personalized with your own preferences.
# On this page
# General settings
- Name - Only visible in the admin section. Your visitors do not see this name.
- Default site - You can set this site as default. It will be selected when you log into your DG1 admin section.
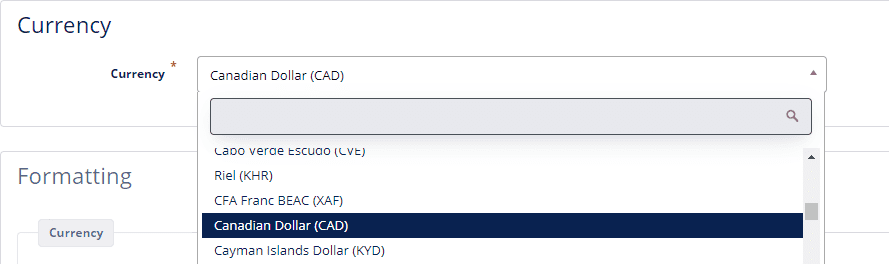
- Choose Currency - Please note that changing the currency while the site is already published and in use, does not convert prices automatically. You will need to change prices manually.
- Formatting
- Decimal separator
- Comma (,)
- Dot (.)
- Centered dot (•)
- Upper dot or Dot above (˙)
- Space ( )
- Single quote (’)
- Thousands separator
- Comma (,)
- Dot (.)
- Centered dot (•)
- Upper dot or Dot above (˙)
- Space ( )
- Single quote (’)
- Number of decimals - By default the right number of decimals is selected based on the currency you choose in the Store settings. When changing the currency, this setting will be overridden.
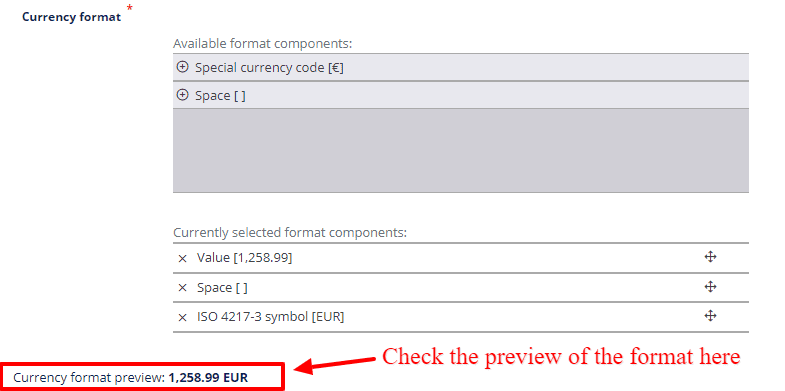
- Currency format - here you can create your own currency format. A default format is already created, which can be seen next to the Currency format preview. Currently selected format components show all the components of your currency format. To change currency format, delete the currently selected components by clicking the x symbols. Then create one by adding the available format components in your preferred order.
- Date and time format - You can change between a number of different formats for displaying date and time.
- Number separators - This setting is only important for the back-end i.e. your administration.
Note
The separators you select must be the same as the ones you will be using in the product import. Otherwise, the prices will appear in a completely wrong format.
- Decimal separator
- Measurement units - Here you can choose the measurements and units for physical quantities.
- Metric, large (kilograms, meters, cubic meters, liters, pieces)
- Imperial (pounds, yards, cubic feet, gallons, pieces)
- US measure units, large, (pound, feet, cubic feet, gallons, pieces)
- Metric, small (grams, centimeters, cubic centimeters, milliliters, pieces)
- Imperial, small (ounces, inches, cubic inches, imperial teaspoons, pieces)
- US measure units, small (ounces, inches, cubic inches, fluid ounces, pieces)
- Homepage - select the content for your homepage. The selected content will appear to your site visitors. Choose between:
- Products grid - the product grid will appear the moment your site visitors open your site.
- Product page - select a specific product you wish to appear on your homepage the moment your site visitors open your site.
- Booking - The booking process with all the products will appear the moment your site visitors open your site.
- Booking product page - select a specific booking product you wish to appear on your homepage the moment your site visitors open your site.
- Page - select a page you wish to show to your site visitors the moment they open your site.
- Designated pages - Help, Terms and Privacy Policy pages will be already connected and prepared for your first site. You should add customized text in WEB CMS - Pages. These three pages appear in the footer of your website.
- Enable push notifications - When disabled, you will not be able to use push notifications as one of your marketing tools in the marketing section of your DG1 platform.
When the site visitors come to your site, they need to allow browser to show the notifications.
Example of how a push notification appears in the front end.Important
Please make sure you have added your custom domain to your website before enabling push notifications. This step is crucial for push notifications to function properly, as your domain is used in the browser-level opt-in prompt, requesting user's permission to show web notifications.
- Limit access - Limiting access to your website comes in handy when you are still setting up your site and you’d like only certain people to test it.
- By default All users have access to the front end
- When choosing Invitation code is only needed at Checkout, the site visitors will be able to access your front end, but will not be able to complete shopping without an invitation code.
- When you choose Invitation code is needed for the entire site, site visitors will not be able to access your site without the invitation code.
# Language settings
- Domain settings
- Primary language - Important for sites with multiple languages! Please check one of your languages as primary. Only one language can be selected. If you will not check any of the languages, the first added language will be treated as your primary language.
- URL domain is automatically filled in. To get a custom domain, you should get in touch with DG1 support.
- URL subfolder can be just a short abbreviation of the selected language or any other phrase to extend the base of the URL.
Important
The URL subdomain for the primary language of your site (or sites) must include the forward slash without the country or language code (e.g. domain.com/). With all additional languages use the forward slash with respective country or language code of your choice (e.g. domain.com/it, domain.com/fr etc.)
- Published - check to publish the site and the selected site language. Leave unchecked to prevent external search engines from finding this site language. The site will only be found and visible if someone will type the correct URL in the browser.
- General info
- Site name that is visible in the front end in the footer of your site and in the title of the website.
- Site description - This is a default site description, visible to external search engines in case no other description is provided.
- Email
- Email sender name - Add a sender’s name for more personalized emails. If left empty the name of the site will be used instead.
- Email signature is the signature in your emails. If left empty the generic signature will be used instead. The signature appears in all automated emails such as order, registration, password reset, booking, etc.
- Contact
- Contact email - This email is also used to receive invitation requests when you have a site with limited access.
- Address
- Contact telephone
- Fax number
Note
Contact details appear on the user registration page, checkout page, and in the footer of the site.
- Social
- Social networks and social channels URLs - add URLs for the following Social networks:
- Youtube
- Depop
- TikTok
- Facebook App ID - add Facebook app ID to enable Facebook purchased product sharing from a Thank you page. To obtain Facebook App ID, follow these instructions.
- Twitter shop username - add a Twitter shop username to enable the Twitter purchased product sharing from a Thank you page.
- Social networks and social channels URLs - add URLs for the following Social networks:
Important
By adding Facebook App ID and Twitter shop username to Social networks, you will enable sharing the purchased products from a Thank you page. To enable the functionality, check the Share purchased products checkbox. When a Thank you page appears to your customers after they have confirmed their order, they will see a Facebook and Twitter sharing icon next to each product from their purchase. By clicking Share, they will be able to share products on their Facebook and Twitter profiles together with the name of your shop and a link to that product.
- Cookie
- Cookie notice is obligatory by law in certain countries, especially in the EU. To disable cookie notice, leave unchecked.
- Cookie policy - Change, edit, or leave the text as it is. In the front end, this policy appears on the second level of your cookie note. First, the site visitor has to click More in the cookie note. After managing the subscriptions, the site visitor then clicks Learn more about our cookie policy. The cookie policy text appears there.
Note
The default cookie policy text has been translated to several site languages. In case you leave the default text as it is, all the site languages will include the same text. If you customize the policy with your own text, then we suggest you translate it in every single site language.
- Product
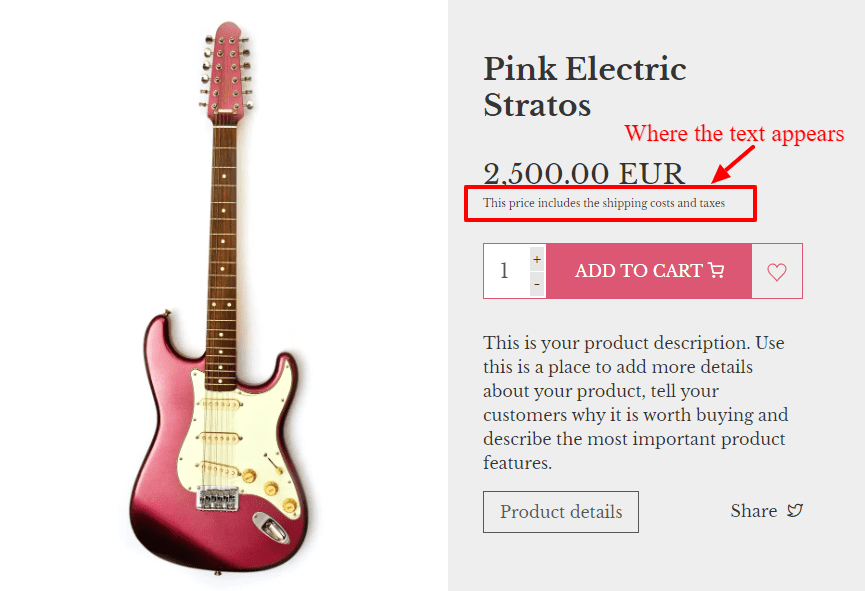
- Shop - Additional price text - Additional text will appear just under the price.
Front end view
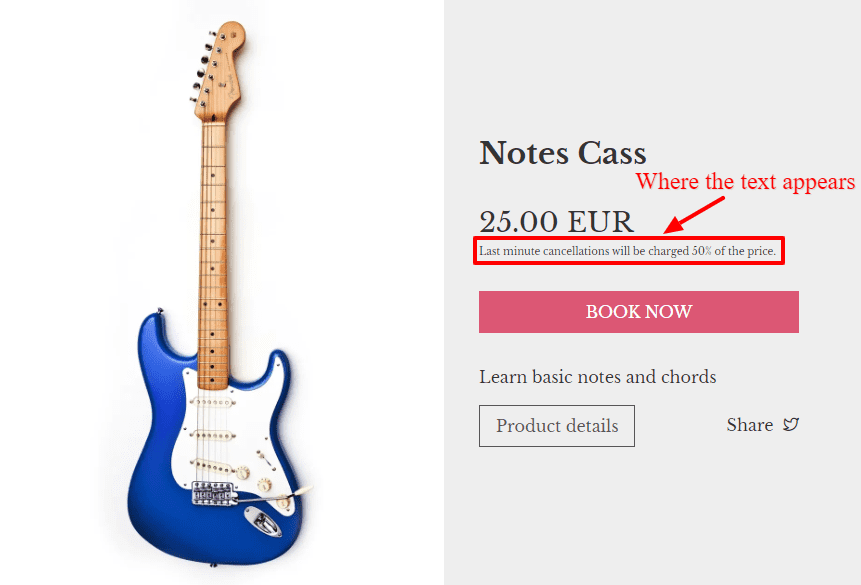
- Booking - Additional price text - Additional text will appear just under the price of the booking product.
Front end view
- Shop - Additional price text - Additional text will appear just under the price.
- Search
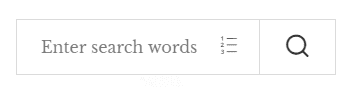
- Search placeholder - Enter a placeholder that will appear as a suggestion or help for your site visitors when using search on your website.
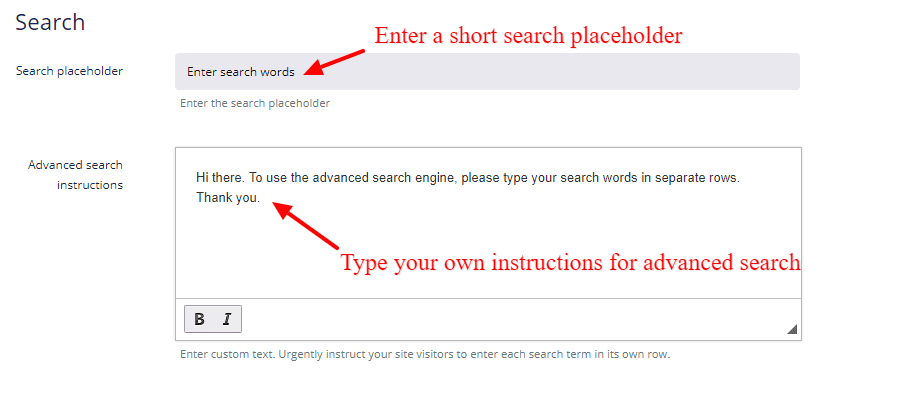
Front end view
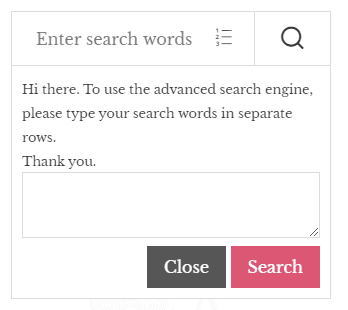
- Advanced search instructions - Enter custom text. For this functionality to work, instruct your site visitors to enter each search term in its own row.
Front end view
- Search placeholder - Enter a placeholder that will appear as a suggestion or help for your site visitors when using search on your website.
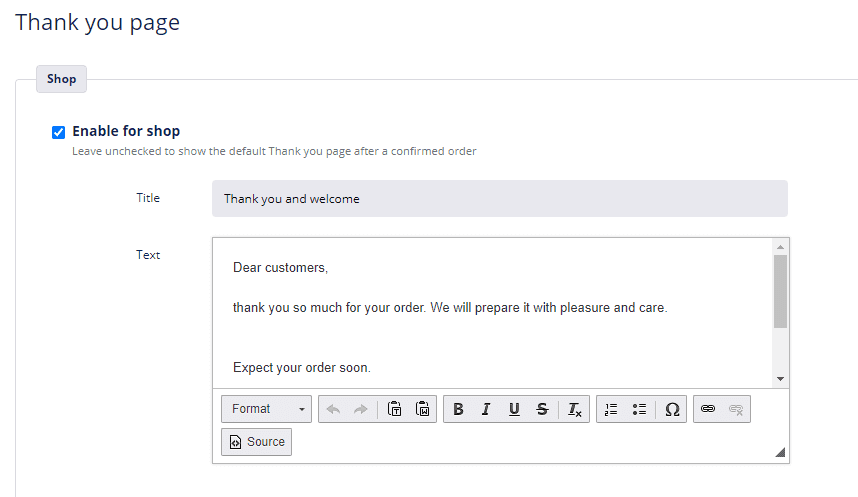
- Thank you page
- Enable for shop - Check to enable a custom Thank you page. A Thank you page appears after the customer has confirmed the order.
- Title - Enter the title of your custom thank you page.
- Text - Enter a custom thank you page text.
- Enable for booking - Check to enable the custom Thank you page after a booking is made. A Thank you page appears after a successful booking.
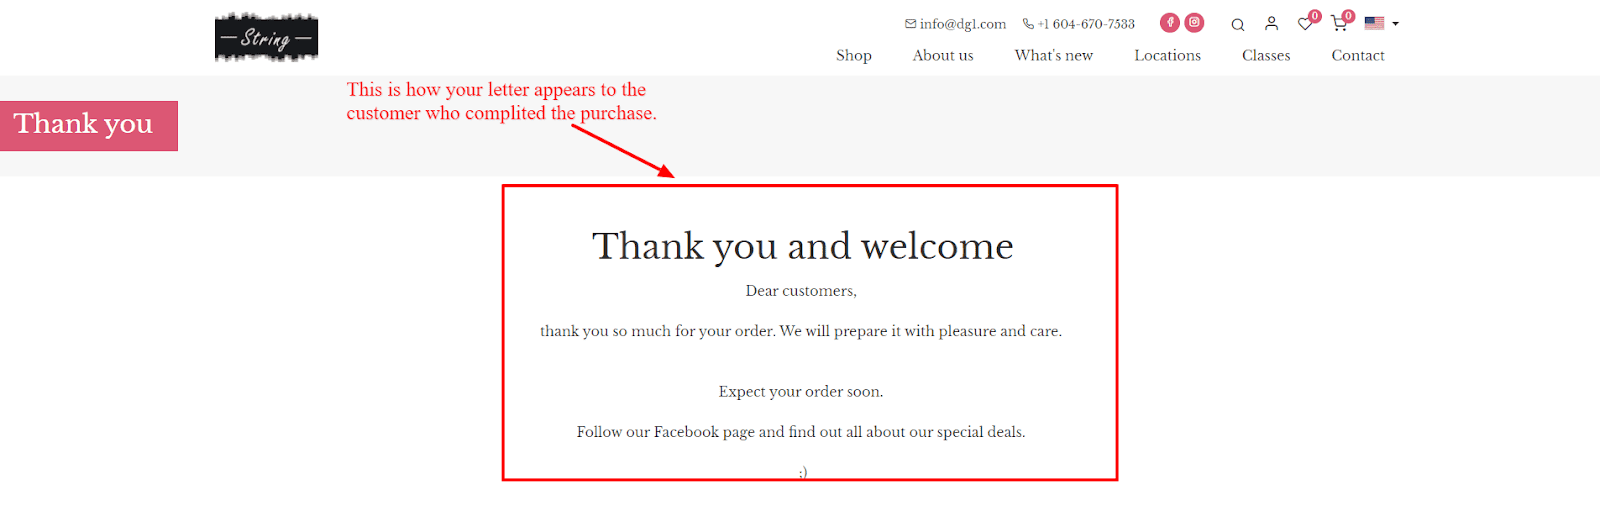
 Front end view of the Thank you page
# Style
Certain settings that need management and are important for your website and the look of it, are strictly managed under Style settings.
The style settings include:
- Selecting theme colors and font
- Selecting header style
- Selecting footer style
- Select product image format
# Logos
- To replace the preset logo with your own logo, navigate to the Logos tab in Edit site settings.
- Click Upload your logo. You can use either JPG, PNG, WebP or SVG formats for uploading your company’s logo.
![]()
Note
We recommend you prepare your logos in the following sizes:
- Site logo - recommended size 250 x 100 pixels
- White site logo - recommended size 250 x 100 pixels and without background - for dark header
- Site logo (square) - recommended size 200 x 200 pixels - for favicon and splash screens
- In the File selector click Upload and Upload files by. Choose your logo and click Open. When you are done, click SELECT & CLOSE.
- Your logo will be added and will appear in the preview window.
- Follow the same steps for White site logo. ThThis logo is crucial for themes and website headers which either have a transparent background (i.e. where an image acts as a background) or contain a colorful background in their design. The white logo will be used automatically, should you change the headers on the website.
![]()
Note
You can upload your Square logo for the favicon and splash screens. You do it the same way as you would for Site logo.
# Store settings
- Enable Shop - Check to enable Shop application. If the Shop is disabled (box in unchecked), the site visitors will not be able to add products to their cart. Leave unchecked if you only wish to have a website without the shop.
- Enable Booking - Check to enable the Booking application. Leave unchecked, if you do not want to sell anything and you would just like to create a website.

- Taxes - Set your Tax rates according to your country’s laws and rules.
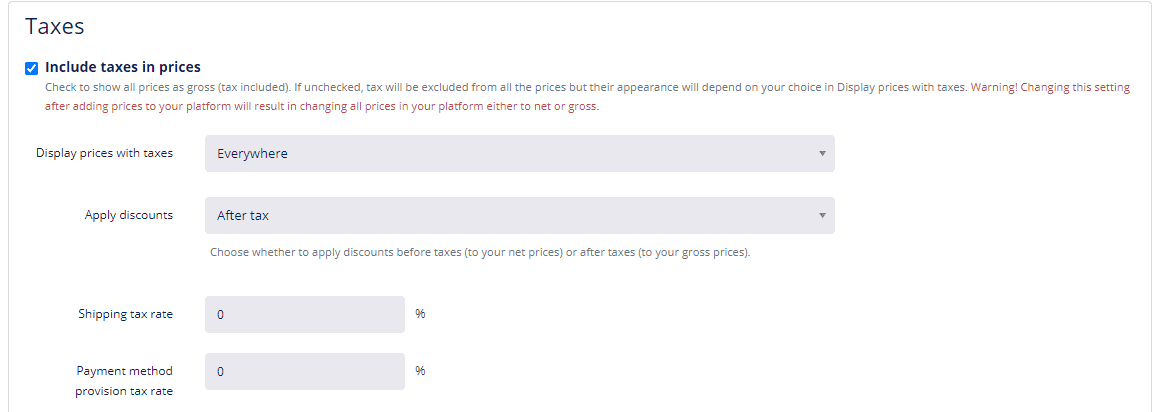
- Include taxes in prices - Leave checked to show all prices as gross (with included tax). Uncheck if you wish to show prices without taxes. In the next step (Display prices with taxes) you can decide where exactly would you like to show the taxes.
- Display prices with taxes - Depending on your choice in the previous step, decide where exactly would you like your gross prices (prices with tax) to be seen:
- Everywhere
- In the cart and all the steps of the checkout process
- Only on the last step (summary) of the checkout process
- Apply discounts - decide whether you would like to apply discounts to your net (before tax) or gross (after tax) prices.
- Shipping tax rate - Add a tax to your shipping rates.
- Payment method provision tax rate - Add a tax to your payment rates
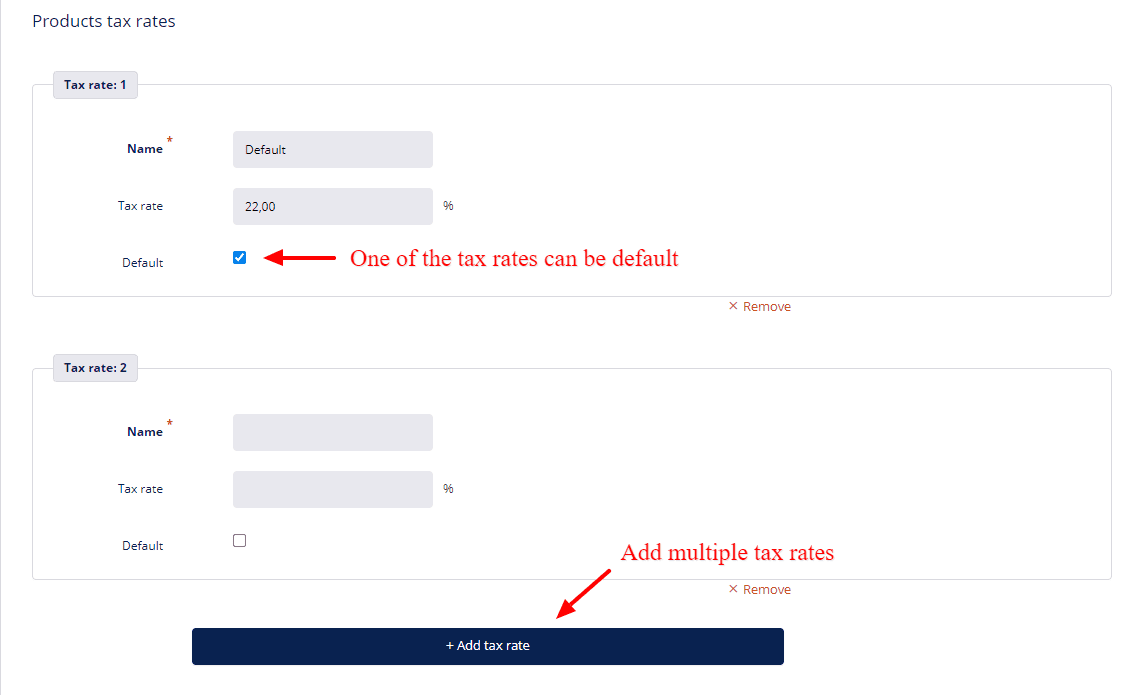
- Products tax rates - Add tax rates for all your products. Add all possible tax rates that exist in your country, so you will be able to select them when adding products or services of different tax groups and types.
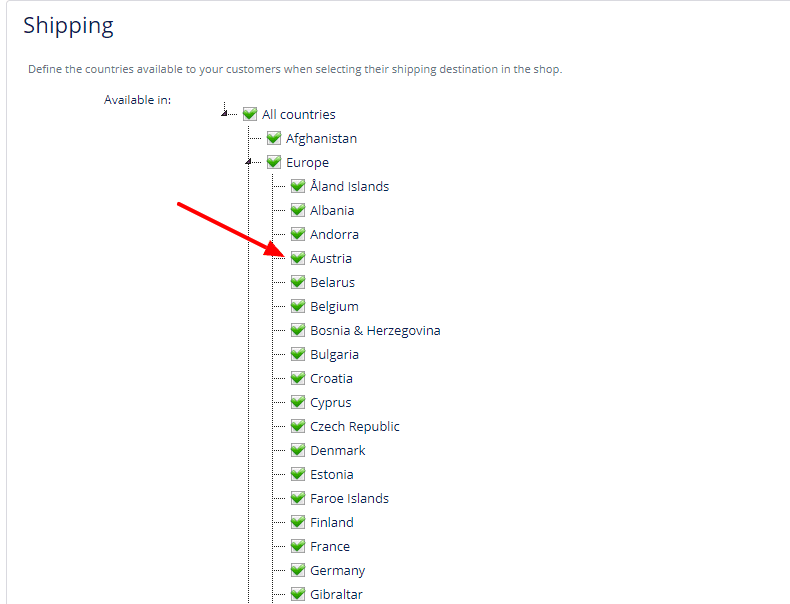
- Shipping - Select countries to which you will ship your goods. You can select multiple countries.
- Stock
- Keep track of stock - Decide whether you wish to keep track of stock or not. Check the option to track the stock. Leave unchecked if you don’t wish to track the stock. The stock will be automatically increased/decreased when an order will be created or modified.
Note
If you choose the option to keep track of stock, be sure to also select the Stock group from which the stock will be tracked. By default one stock group is created. To create more stock groups, navigate to Stock groups.
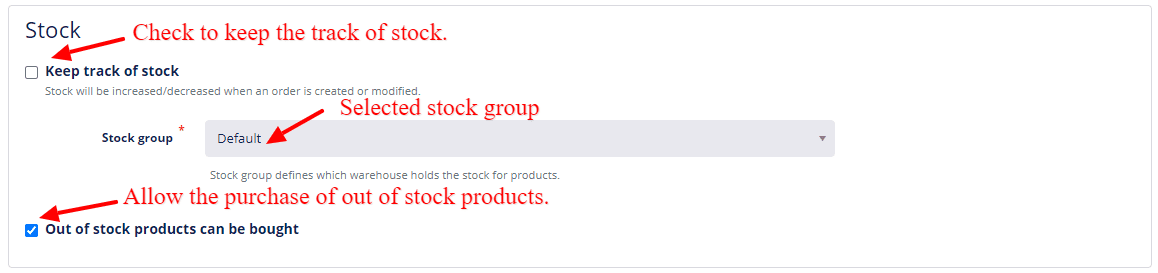
- Out of stock products can be bought - Check in case your wish to sell products even though they are out of stock. The option of out of stock products can be bought is very useful for whoever is producing their own products and never runs out of stock.
- Keep track of stock - Decide whether you wish to keep track of stock or not. Check the option to track the stock. Leave unchecked if you don’t wish to track the stock. The stock will be automatically increased/decreased when an order will be created or modified.
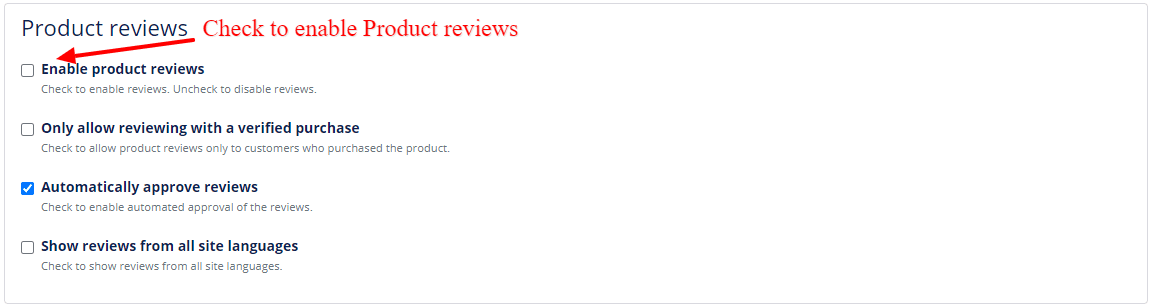
- Product reviews
- Enable product reviews - Product reviews appear in the front end under the product on the Product page. Check to enable reviews.
- Only allow reviewing with a verified purchase
- Automatically approve reviews
- Show reviews from all site languages
TIP
To learn how to use Product reviews, click here.
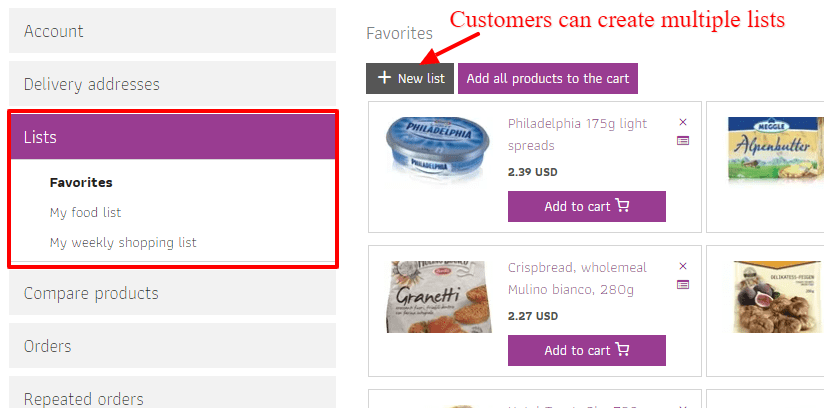
- Favorites - Favorites and shopping lists appear in the customer’s profile.

Front-end view - lists in the customer’s profile
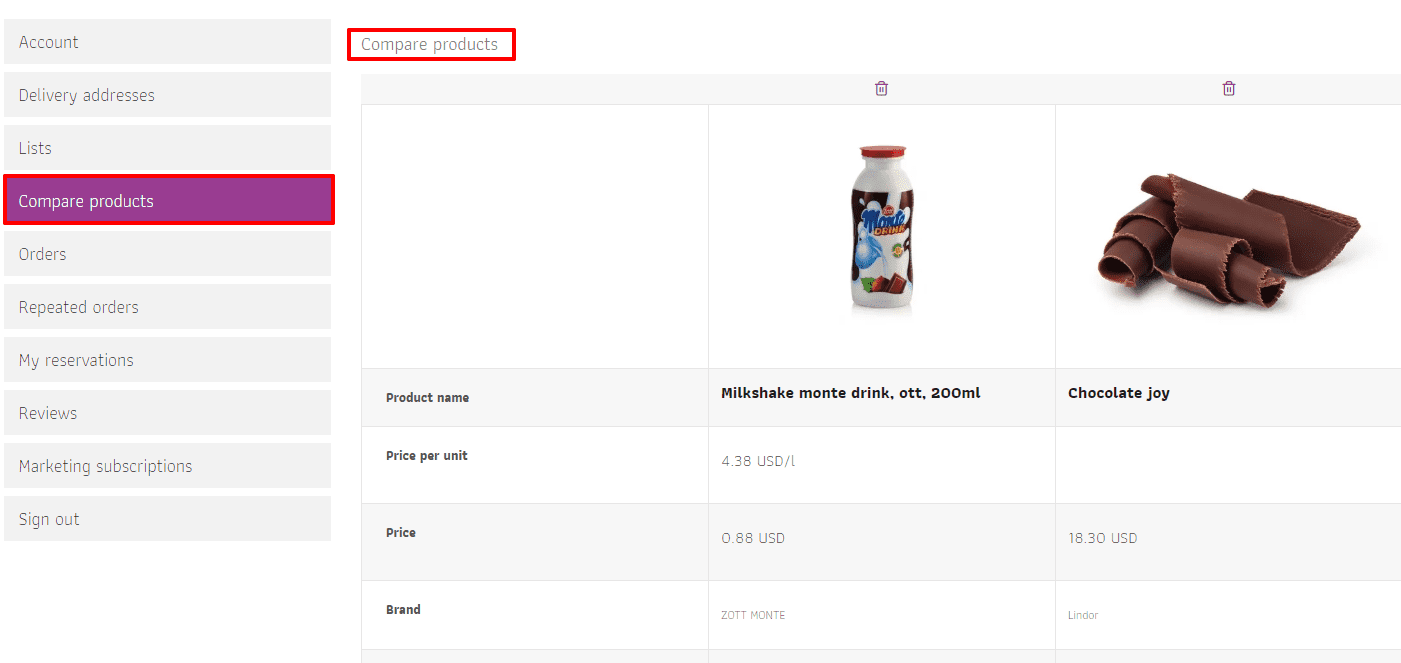
- Product comparison - Check to enable product comparisons. The product comparisons are only available to registered customers who are logged in their account.

In the front end the customers browse through products and click Add to compare.
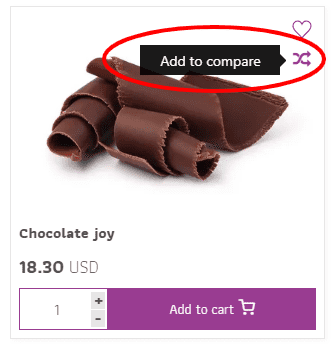
Then they go to their profile and click Compare products.
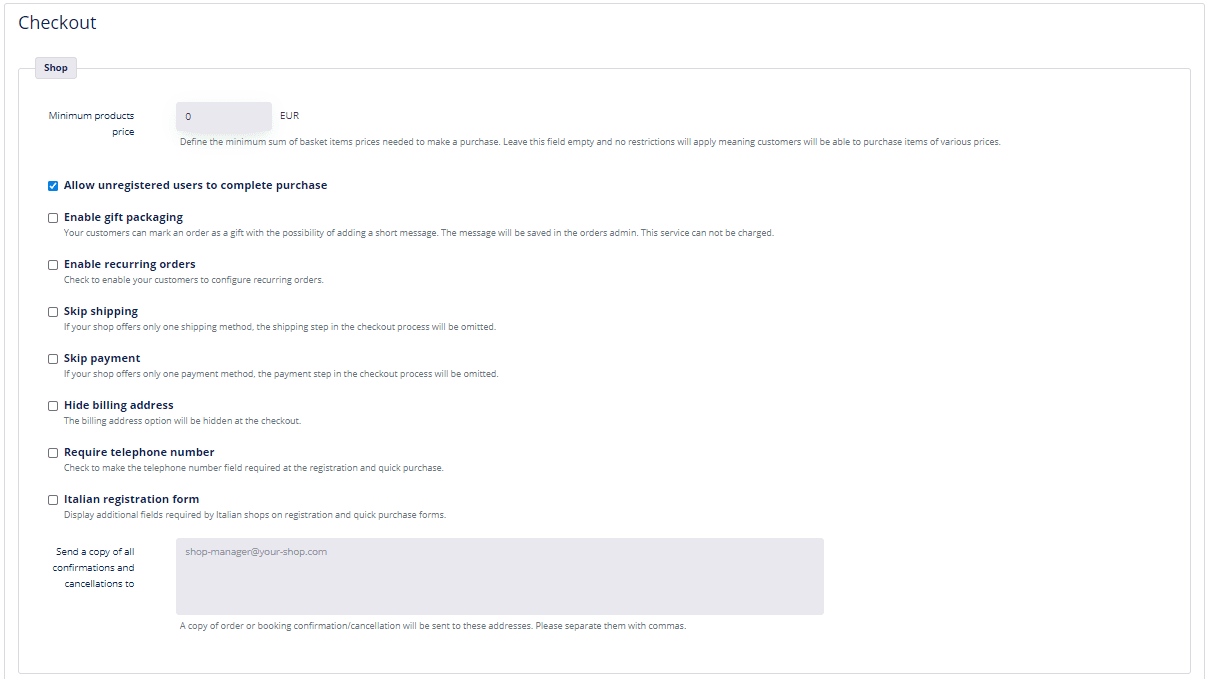
- Checkout – Shop
In the Checkout Shop section you can set the following options for your customers:- Minimum cart sum - Set the minimum cart sum to avoid very low purchases.
- Allow unregistered users to complete purchases by checking the checkbox or leave unchecked to prevent unregistered users from making purchases.
- Enable Gift packaging - Check to enable. The gift packaging has to be free of charge. At this point there is no option to charge gift packaging. Suggestion: You can create a Gift wrapping product or service with a price in your product grid.
- Enable recurring orders - Check to enable. Recurring orders allow your customers to create automated orders which will be placed after a certain amount of time. Note! In the front end your customers can enable their recurring orders from their account under My orders (but only if they are signed into their account).
- Skip shipping - Checking the Skip shipping option will prevent any shipping methods from being shown to your shop users. The shipping step of the checkout process will be bypassed. This is useful in case you only offer one shipping method.
- Skip payment - Check to skip payment in the checkout process. The payment method will be skipped, and it will redirect your customers directly to the available payment method. This option is useful in case of only one payment method available at the checkout.
- Hide billing address - Checking this option will merge the delivery and billing address as one.
- Require telephone number if you need to collect this information for shipping purposes. Check to make the telephone number field required at registration and quick purchase.
- Italian registration form is for Italian shops only and adds additional fields to the registration and purchase forms.
- You can add email addresses to Send a copy of order confirmation or cancellation to those addresses. You can add several emails, but be sure to separate them with commas (,).
- Checkout - Booking
Your booking application enables you to make a customer registration during the reservation process optional, required or disabled.- If you select Required, the registration form will appear in the last step of the booking/reservation process.
- If you select Optional, the customer information with Name, Surname, Email, and Phone number will appear, but the registration form will only appear if the customer will tick the “Create an account” option.
- If you select Disabled, the registration form will not appear, only the customer information form will.

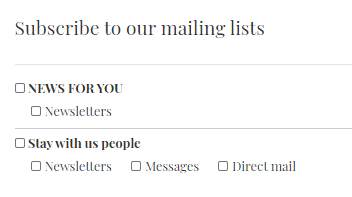
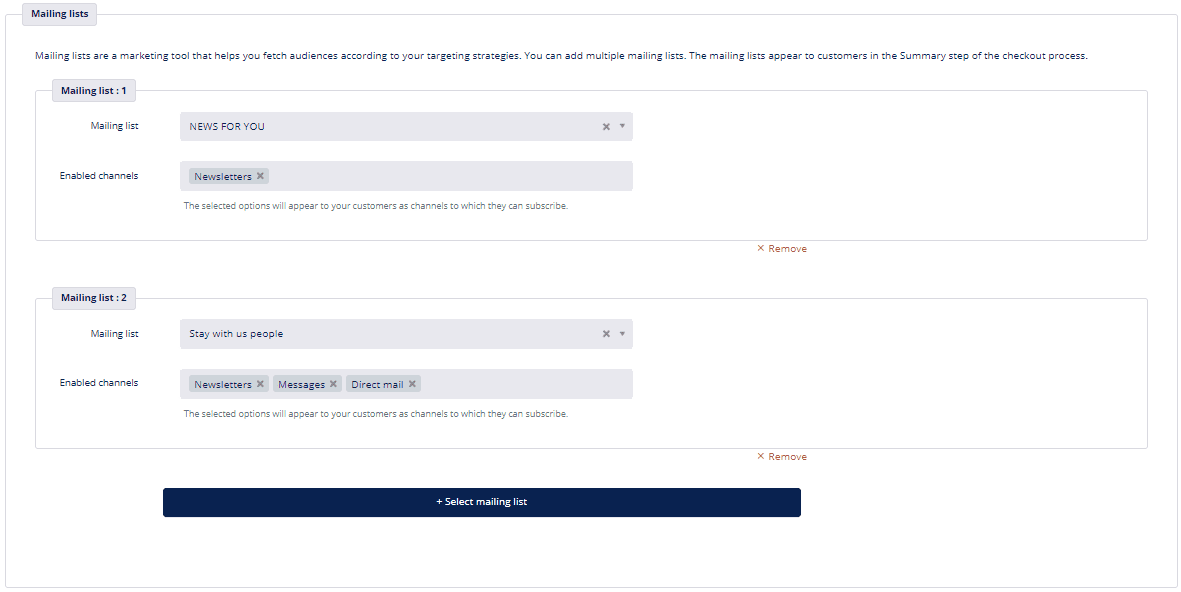
- Mailing lists
Mailing lists are a marketing tool that helps you reach out to your audiences according to your targeting strategies. You can add multiple mailing lists. The mailing lists appear to customers in the Summary step of the checkout process.- Select to which Mailing lists your customers will be added.
- Select Enabled channels. Choose between All, Messages, Direct Mail, Email, Call lists.
You can add multiple mailing lists.
Front end view