# Create a new newsletter
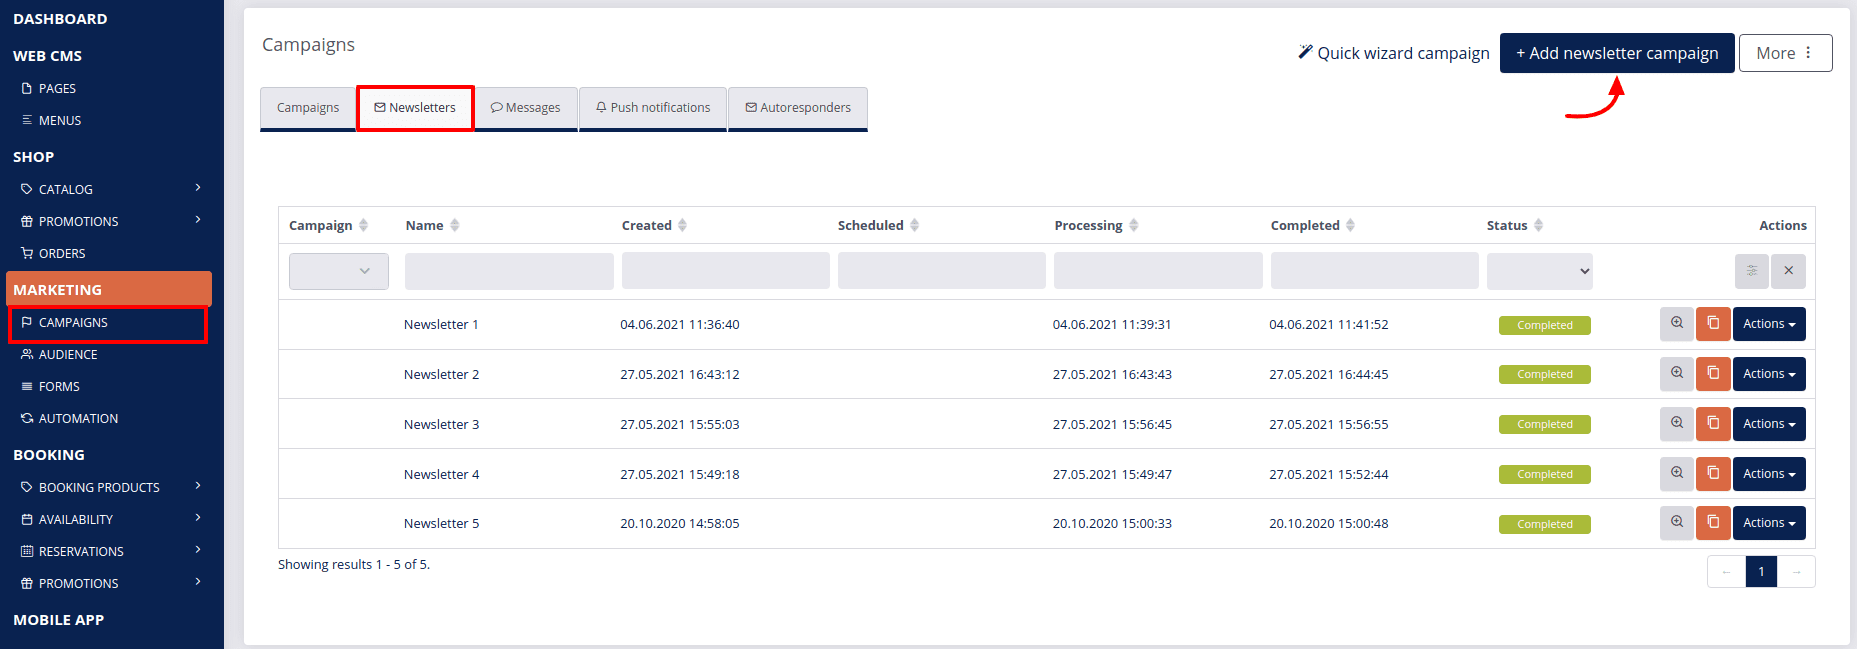
- Go to the Campaigns page under the Marketing section of the sidebar menu and select the Newsletters tab.
- Click +Add newsletter campaign
 .
.
- Enter the following information to create a new newsletter:
- Write a Name.
- Key is written automatically.
- Add a Description (optional).
- Choose a Language. Example: English.
- To add your Newsletter to an already an existing campaign choose the Main campaign. This is useful in case of viewing and analyzing campaigns statistics.
- You can Schedule the processing in advance. Example: Next day at 9:00 AM.
- Segment - A very important aspect for your targeting campaigns is choosing the right segments of your contacts. Note that you can never select a specific segment of contacts unless you also select a mailing list to which this segment belongs. (optional)
- Mailing lists - If you do not wish to add segments and would like to send a newsletter in general to different mailing lists, choose your mailing lists. The default mailing list will already be chosen. To add other mailing lists, click the gray field next to the Default one and select them from the drop down menu.
- Site - Limit the contacts you wish to target with this newsletter by selecting the site from which they entered the system. Only one site can be selected.
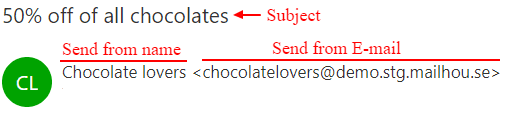
- Send from name - Write a name from which the newsletter email will be sent. Example: Chocolate lovers.
- We recommend you leave Reply to email as it is. But if you wish to receive potential replies to your emails, then enter a valid email address.
- Subject is the subject of the email your recipients will receive. A huge amount of email recipients decide whether or not to open an email based on the Subject line alone. That's why it's so important to craft subject lines that are compelling enough to get people to click through.
- Newsletter template - Select a template according to your theme and your theme color. Example: Craft Fresh Blue. The first and most important element are the materials (photos and texts), which you will have to prepare before creating a newsletter. Once you’ve chosen the theme and color for your newsletter, click the Preview template to see all the possible sections in your newsletter within the selected template.
Note
When preparing images for your newsletter, keep in mind that they will appear in the same size in which you upload them. For example, if you would like to use a 250x250 image in your newsletter, be sure to upload one with the same size and ratio.
- To continue to the next step Next
 .
.
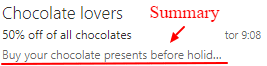
This brings you to the most important part of creating a newsletter – preparing the content. A strong advice to all who are doing this for the first time: follow the below steps closely and try not to rush. As you can see, the Subject is copied from the previous step. You can add a Summary, which will be visible as the header of your email in certain email clients.
- HTML content: You can add as many different sections to your newsletter as you like by selecting the whole “Select this text and click "Add section" to insert new section.” text and clicking the Add section button.
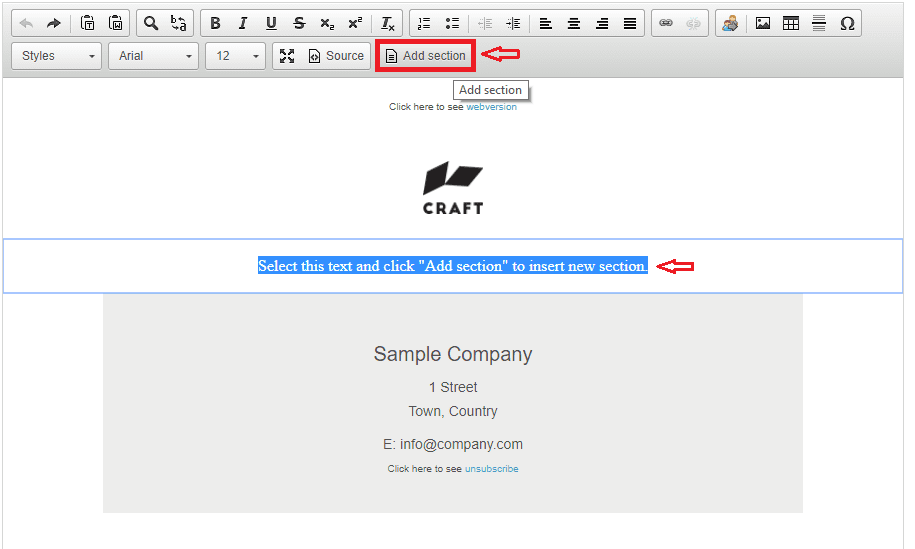
Here is how to edit and customize the newsletter template to your liking and needs.
- Once you are done editing your newsletter, click Next to move on to the last step - Triggers.
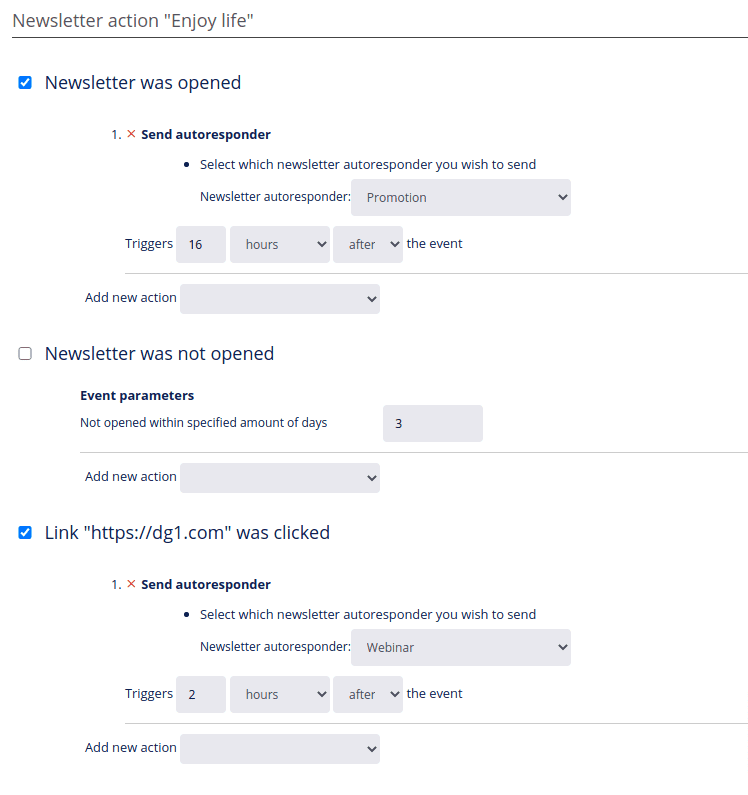
If you have an Autoresponder, ready you can choose one or all the options:
- If the newsletter was read.
- If the newsletter was not read.
- If the link was clicked. (only when you added links in the newsletter)
- To save newsletter campaign click Finish
 .
. - To activate and process the newsletter campaign, click here.